

How To Set Up Nvr With Cameras Ubiquiti
The Unifi Camera is a really expert choice. They are priced really overnice and deliver high-quality video recordings. Only you demand a device to record the videos on, an NVR. Now you could buy the Unifi NVR, but they are pretty expensive if you only want to record a couple of cameras at dwelling or at the function. If you lot accept a Synology NAS, so you can connect your Unifi Camera to the Synology Surveillance Station.
Note
This article is about the older Unifi Camera's. Not all Unifi Protect photographic camera's can be used on Synology Surveillance Station. Read more most Unifi Protect in this article.
With the Surveillance Station, you tin can record videos based on motion or time, transport alerts when motion is detected, and save the recording for a given amount of time. In this article, I will help you add the Unifi Photographic camera to the Synology Surveillance Station.
Installing Synology Surveillance Station
We are going to install the Surveillance Station commencement on the Synology.
- Login to your Synology and open up the Package Heart.
- Search for Surveillance and install the Surveillance Station

You tin access the Surveillance Station straight without first logging into your NAS. During the installation, you lot tin can fix an alias of a different port so you tin can admission the Surveillance Station straight from your browser.
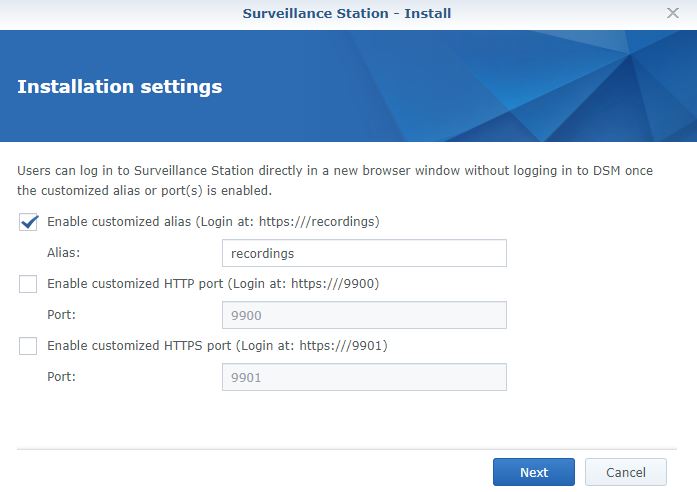
The installation may take a couple of minutes. And then we leave the browser open up and keep with preparing the Unifi Camera.
Preparing the Unifi Camera
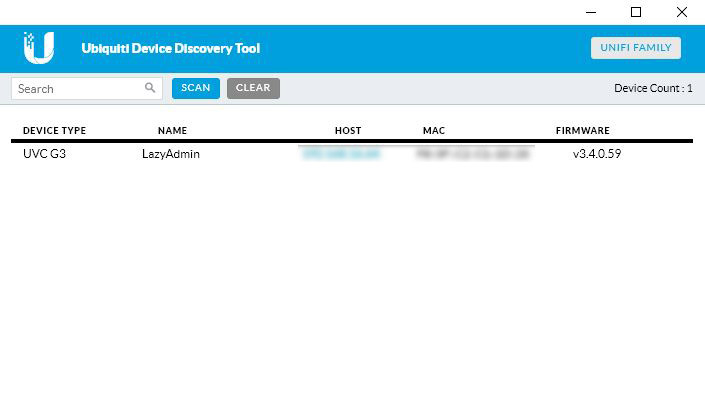
Nosotros are going to set a static Ip Accost for the photographic camera, alter the default login, and lookup the RTSP URL. If you take continued your Unifi Camera to your network, simply you don't know its IP Address, then you can employ the UBNT discovery tool to find it. Download the discovery tool from the Chrome Webstore. It will detect your photographic camera in seconds.
Setting a Static Ip Accost
If you have found the camera with the Discovery Tool, then click on the Host address to open up the browser. If you know its IP address, then open your browser and navigate to the IP address of the photographic camera. The default login of the Unifi Camera is username ubnt and password ubnt.

Past default, the photographic camera is assault DHCP mode. This fashion the photographic camera gets a random IP Address from your router every time information technology reboots. If we leave it at DHCP, then the connexion with the Surveillance Station will exist lost afterward a reboot.
- Click on the Network tab
On the right side, you lot will see the current network data - Select Static
- Enter an IP Accost, for case, 192.168.i.210. (the start iii parts of the IP Accost should stay the same as it was before)
- Enter the same gateway as y'all encounter on the right side
- Aforementioned for DNS
- Click on Save Changes
Your photographic camera will now be available on the new IP Address. So navigate to the new address to open the camera settings.
Change the default camera login
While we are logged into the camera, is it also a good moment to change the default login. Just like any other slice of network equipment is information technology important to change the default credentials. This will reduce the possibility that some proceeds admission to your network.
- Open the System tab
- Enter the former password (ubnt)
- Enter a new strong password
- It's too a good practise to alter the default username. This will make information technology even harder to gain access.
Go the RTSP URL
The terminal part is to go the RTSP URL. Nosotros need this URL to add the camera to the Surveillance Station. You volition observe the URL on the Configure Tab of the Unifi Photographic camera.
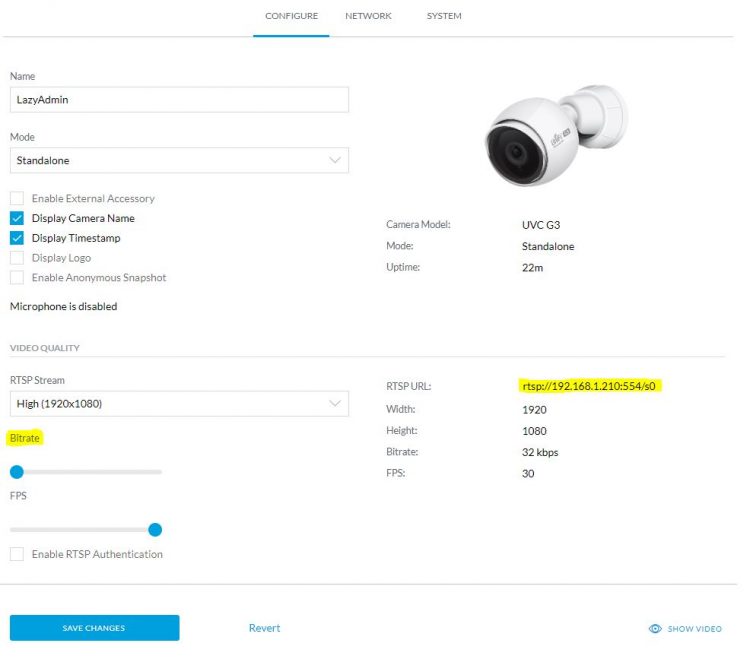
Some take trouble adding the camera to the Surveillance Station. The photographic camera won't connect or doesn't testify the video stream. To solve this you volition take to lower the Bitrate to below 1000 (default is 6000). So if you have trouble adding the photographic camera in the next steps, just go back to the Configure page of the camera and lower the bitrate. You can turn it back up to 6000 if the camera is connected.
Adding the Unifi Camera to the Surveillance Station
The installation of the Surveillance Station should exist done by now. Open it and click on Add together Camera to get started. The Add Camera Wizard will prove:
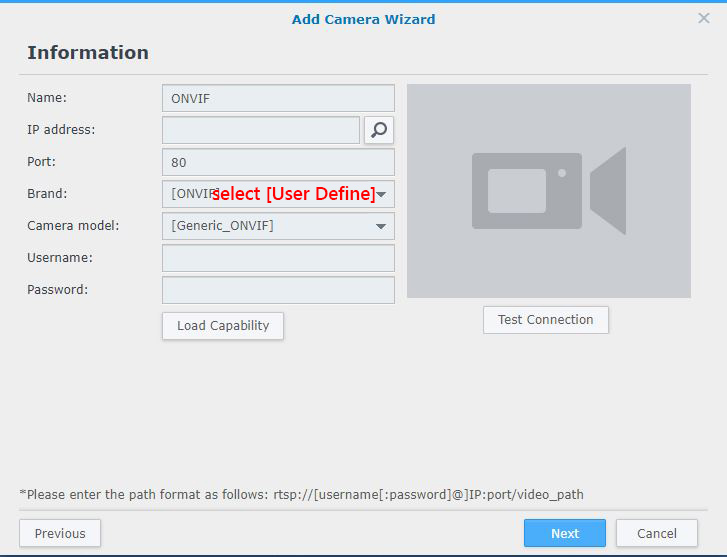
- First, you need to change the Make to [User Define]
The information page will change: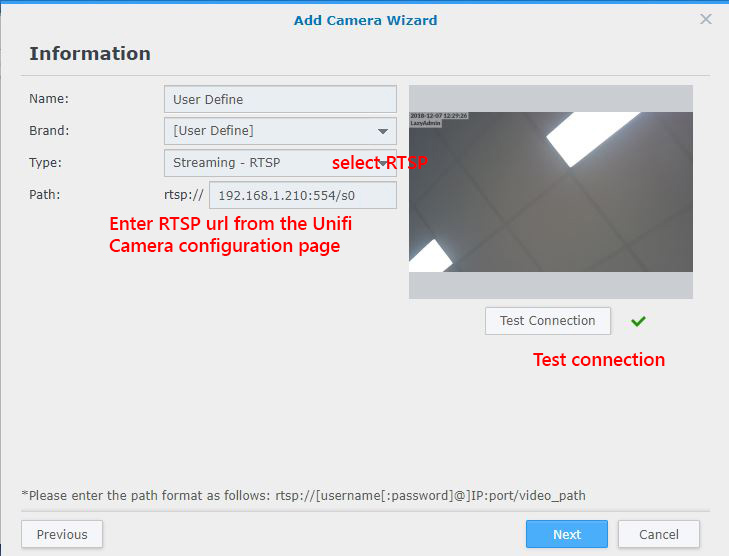
- Set Type to Streaming – RTSP
- Enter the path, here you will copy / paste the RTSP stream URL.
- Click on Examination Connexion. You should run across the camera feed.
- Click on Next
- Leave everything on default on the Video folio and click on Side by side
- On the Recording folio yous can modify some settings if you like:
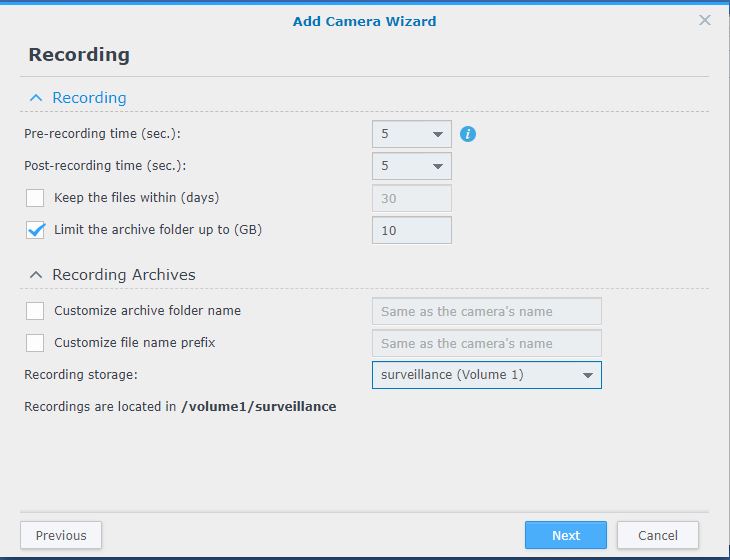
- The Pre-recording time is the corporeality of seconds earlier an event will be stored. Keep 3 seconds as a minimum.
- Mail-recording is the time afterwards an consequence.
- You can cull to delete the files subsequently ten days. If you live in the EU and you use this in a business organization environment so you need to delete it subsequently xxx days because of the GDPR Law
- Limit the amount of information. Make sure that the recording can't take upwards all the space on your NAS.
- On the last page, you tin can schedule when the camera needs to offset recording. I accept set it to record on motion but.

The camera is now added to the Synology Surveillance Station. You can at present watch the live stream, or if you prepare information technology to motion just, you tin can set the Movement Detection Area.
Set Motion Detection Area
You lot may only want to start recording when a specific door is opened or when someone is walking up to your driveway. To exercise this nosotros can define a motion detection surface area. Select the camera and click on Edit.
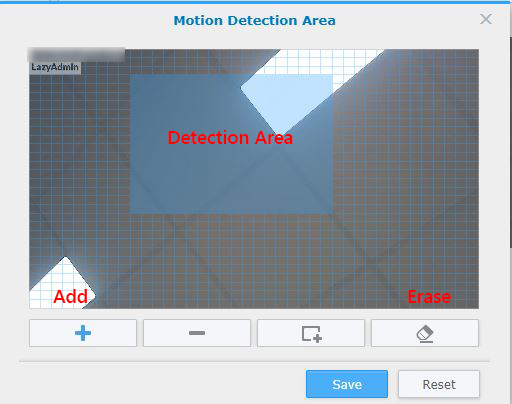
- Get to Event Detection
- Click Edit Detection Area
- Offset expanse all
- Click on the plus icon
- Elevate over an area that you would like to discover.
Conclusion
If you want to record multiple cameras and you take the upkeep for it, I really recommend going for the Unifi NVR. The NVR allows you to proceed your photographic camera upward-to-date and the motion detection area tool in the Unifi NVR is more advanced. Nevertheless, if you have a Synology and just need to record a couple of cameras, then the surveillance station is a really good option.
Looking upwardly recording in the timeline tool is actually easy, the event notification is working perfect,ly and adding a camera is washed in a couple of minutes.
Promise yous found this guide useful, if you lot accept whatsoever questions, merely drop a comment below.
Source: https://lazyadmin.nl/home-network/adding-unifi-video-camera-to-synology-surveillance-station/
Posted by: lenahancrioul.blogspot.com
0 Response to "How To Set Up Nvr With Cameras Ubiquiti"
Post a Comment